Growing Garlic: Types to Planting, Caring, and Harvesting
Published: 25 Apr 2025

Wait—garlic? That humble kitchen staple that’s always just there in your pantry? Most people don’t realize how simple and satisfying it is to grow their own. Whether in a backyard bed or a garden pot, growing garlic gives you a deeply flavorful harvest, unmatched freshness, and a feeling of pride every time you crush a clove. Let’s walk through the full journey—from choosing your garlic to pulling your first beautiful bulbs from the soil.
So, guys, without wasting time, let’s jump into the article to learn Growing Garlic: Types to Planting, Caring, and Harvesting
Choosing the Right Type of Garlic
- Hardneck vs. Softneck Garlic
- Hardneck garlic grows well in colder climates and produces flavorful cloves with a central stalk (called a scape).
- Softneck garlic thrives in milder climates and has a longer shelf life, making it great for braiding and storage.
- Flavor Profiles
- Hardneck varieties often have a bold, complex, and spicy flavor.
- Softneck varieties tend to be milder and slightly sweeter, perfect for everyday cooking.
- Climate Compatibility
- Choose hardneck for areas with cold winters (zones 3–7).
- Opt for softneck in warmer regions (zones 8 and up).
- Storage Life
- Softneck garlic stores up to 9–12 months when cured properly.
- Hardneck garlic generally stores for 4–6 months but has richer taste.
- Popular Varieties to Try
- Hardneck: ‘Rocambole’, ‘Music’, ‘German Red’
- Softneck: ‘California Early’, ‘Inchelium Red’, ‘Silverskin’
When and Where to Plant Garlic

- Plant in Fall for Best Results
- Garlic is typically planted in the fall (September to November).
- Fall planting allows roots to establish before winter, resulting in larger bulbs by summer.
- Choose a Sunny Location
- Garlic needs 6–8 hours of direct sunlight daily.
- Pick a spot that gets full sun, even in the cooler months.
- Soil Requirements
- Prefers loose, well-draining soil rich in organic matter.
- Aim for a slightly acidic to neutral pH (6.0–7.0).
- Raised Beds Work Wonders
- Raised beds improve drainage and soil warmth—ideal for garlic growth.
- You can also plant in garden beds or deep containers with good airflow.
- Container Growing is Possible
- Garlic can grow in pots at least 12–18 inches deep, especially softneck types.
- Just ensure consistent watering and full sun exposure.
How to Plant Garlic the Right Way
- Start with Healthy Seed Garlic
- Use organic, disease-free garlic bulbs from a nursery or seed supplier.
- Avoid supermarket garlic—it’s often treated to prevent sprouting.
- Separate Cloves Before Planting
- Gently break the bulb into individual cloves just before planting.
- Do not peel the cloves; leave the papery skin on.
- Proper Spacing and Depth
- Plant cloves 4–6 inches apart, in rows spaced about 12 inches apart.
- Place each clove 2 inches deep, with the pointy end facing up.
- Mulch After Planting
- Cover the soil with straw, shredded leaves, or mulch to retain moisture and protect against winter cold.
- Mulching also helps suppress weeds.
- Water Well After Planting
- Water the bed thoroughly after planting to help cloves settle in.
- Keep soil consistently moist, but never soggy, especially during early growth.
Caring for Your Garlic as It Grows
- Watering Wisely
- Keep soil consistently moist during early growth—especially in spring.
- Stop watering 2–3 weeks before harvest to avoid rot and help bulbs dry.
- Fertilizing for Bigger Bulbs
- Apply compost or a balanced fertilizer (like 10-10-10) in early spring.
- Avoid high-nitrogen fertilizers late in the season—they promote leafy growth over bulbs.
- Keep It Weed-Free
- Garlic hates competition—remove weeds regularly to prevent stunted growth.
- A layer of mulch also helps keep weeds down.
- Remove Scapes on Hardneck Garlic
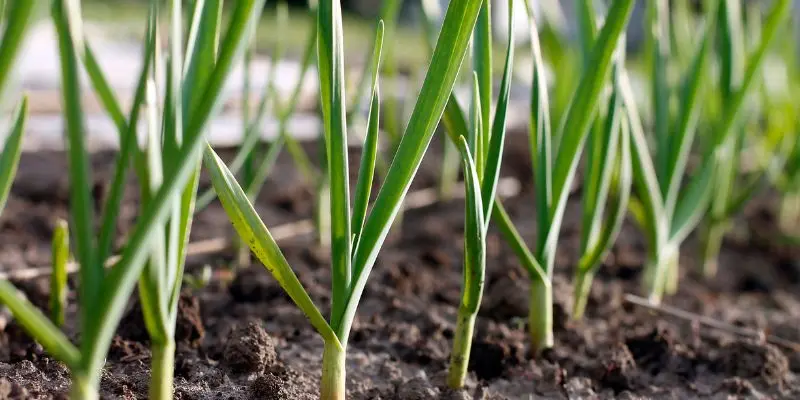
- When curly green shoots (scapes) appear, cut them off so the plant puts energy into the bulb.
- Bonus: scapes are edible and delicious in pesto or stir-fries!
- Monitor for Pests & Disease
- Watch for fungal issues like white rot or rust, and practice crop rotation.
- Avoid wet foliage—water at the base, not from above.
When and How to Harvest Garlic

- Timing Is Key
- Garlic is usually ready to harvest in mid to late summer, about 8–9 months after planting.
- Watch the leaves—when the bottom 3–4 leaves turn yellow but the top are still green, it’s harvest time.
- Check for Bulb Size
- Gently dig around one bulb to check if it’s well-formed and has cloves.
- Don’t wait too long—overripe garlic can split and won’t store well.
- 🪛 How to Harvest
- Use a garden fork or trowel to loosen the soil—don’t pull the plant by hand.
- Lift the whole plant carefully to avoid damaging the bulb.
- Cure Before Storing
- Hang or lay garlic in a shady, well-ventilated area for 2–3 weeks to dry the outer layers.
- Curing enhances flavor and extends shelf life.
- Trim and Store Properly
- After curing, trim roots and stalks, brush off loose dirt (don’t wash), and store in a cool, dry, dark place.
- Well-cured garlic can last up to 6–12 months, depending on the variety.
Common Garlic Growing Mistakes to Avoid
- Planting at the Wrong Time
Garlic should be planted in the fall (around 4-6 weeks before the ground freezes). Spring planting leads to smaller bulbs. - Using Store-Bought Garlic
Grocery garlic is often treated to prevent sprouting and may carry diseases. Always use certified seed garlic suited for your region. - Not Separating Cloves Properly
Don’t plant the whole bulb! Break it into individual cloves, and use only the largest ones for planting. - Planting Too Shallow or Too Deep
Garlic should be planted 2 inches deep, pointy end up. Too shallow = exposure to cold; too deep = slow growth. - Overwatering or Poor Drainage
Garlic hates soggy feet. Make sure your soil is loose and drains well to prevent rot and disease. - Letting Weeds Take Over
Garlic doesn’t compete well with weeds. Keep your beds weed-free so your garlic can thrive.
The Joy of Homegrown Garlic
- Freshness Like No Other
Homegrown garlic is ultra-fresh, with a bold, rich flavor that beats anything from the store. - Endless Culinary Uses
From roasts to dressings to garlic butter – your dishes taste better with your own flavorful bulbs. - Saves Money in the Long Run
One bulb can yield 6–10 new cloves! Grow once, harvest for seasons. - Eco-Friendly & Sustainable
No plastic packaging, no transport emissions – just earth, sun, and love. - Therapeutic Gardening Experience
Planting and harvesting garlic is grounding, relaxing, and deeply satisfying. - Total Control Over Quality
You know exactly what went into your soil—no chemicals, no pesticides, just organic goodness. - Shareable & Giftable Harvest
Friends, family, and neighbors will love your homegrown garlic – it makes a thoughtful, delicious gift.
Want tips on harvesting or storing to it.
Harvesting Tips:
- Know When to Harvest
Harvest when the bottom 3–4 leaves have turned brown, but the top ones are still green—usually mid to late summer. - Don’t Pull – Loosen First
Use a garden fork to gently loosen the soil around the bulbs before lifting them out to avoid damaging them. - Skip the Wash
Don’t wash garlic after harvest. Just brush off excess dirt gently and let it cure with the outer skin intact. - Cure Properly
Hang bulbs in bunches or lay them out in a well-ventilated, shaded, dry area for 2–4 weeks until the skins are papery.
Refrences
Hardneck (better flavor, fewer cloves) and Softneck (longer storage, more cloves). Choose based on your climate and needs.
Here is the Online source regarding Growing Garlic: Types to Planting, Caring, and Harvesting
Author Name .
By Janet Bachmann,
Garlic organic production

- Be Respectful
- Stay Relevant
- Stay Positive
- True Feedback
- Encourage Discussion
- Avoid Spamming
- No Fake News
- Don't Copy-Paste
- No Personal Attacks

- Be Respectful
- Stay Relevant
- Stay Positive
- True Feedback
- Encourage Discussion
- Avoid Spamming
- No Fake News
- Don't Copy-Paste
- No Personal Attacks


